It is always a good idea to replace the impeller. To get to the impeller, you have to take off the power head, disconnect the shift linkage, and take off the lower unit. Taking off the power head is considered to be a pain because newer motors do not require this, but it is not so hard so don't be afraid. The impeller is one of the most critical parts of the motor because it fails, you can easily burn the motor up, warp the head, or have other major problems. You can tell if a motor ever got hot because the paint on the cylinder head or exhaust port will be scorched. When running, you should see a good amount of water sputtering out of the lower unit exhaust. If you don't see water coming out of the lower unit, shut the motor down and replace the impeller before ever running it again. You should also be able to touch the cylinder head and crankcase with your fingers and not get burnt. Newer motors have a "telltale" that will visually let you see it "pee" water through a hole in the lower crawling. These older motors do not have the "telltale," so you have to look all the way down in the back of the lower unit to see the water being exhausted.
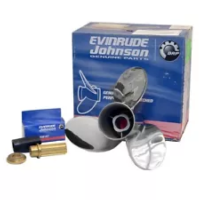
Impeller OMC Part Number 434424 NAPA/Sierra Part Number 18-3001
Help support this site: Click HERE and buy it on Amazon.com
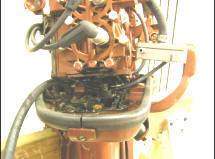
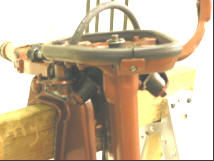
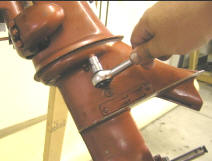
Remove the seven screws that hold the power head. You should also remove the throttle linkage that goes between the tiller arm and the timing advance lever. You may need to gently pry the power head crankcase up to break the seal. Lift the entire power head and set it aside.
|

|
|
|
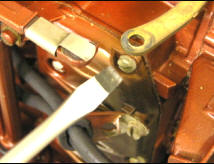
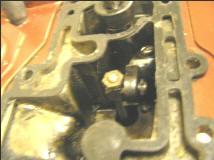
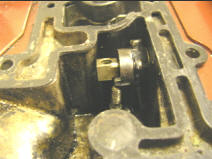
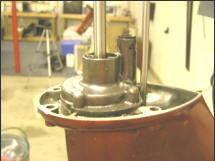
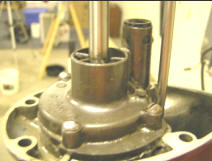
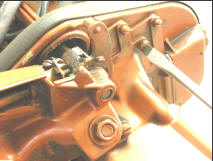
Looking down into underneath where the powerhead sits, you can see the nut that holds the shift linkage. There are two nuts there separated by a lock washer. Remove these nuts and disconnect the shift linkage. You may have to move the shifter into the forward position to get the linkage to separate. While you are here, remove the spring cap and spring from the top of the drive shaft. Be careful because these parts like to jump out and get lost.
|
|
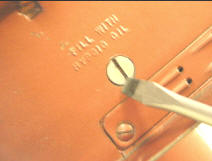
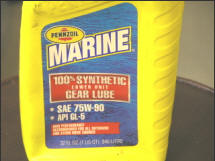
At some point, you will want to change out the lower unit oil. Go ahead and do this now do you don't forget to do it later. Remove the upper and lower drain screws and drain out the old oil. The stuff that came out of mine looked more like used motor oil. Go ahead and replace the lower unit oil with proper outboard lower unit gear lube. Don's use the hydraulic fluid as it says on the side of the lower unit. The spec for this lower unit gear lube is Lower unit oil: 80/90W / OMC/BRP HiVis and can be found just about anywhere.
|
|
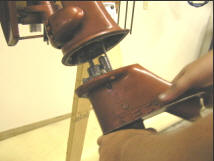
Using a 7/16 wrench, remove the four lower unit bolts. Pull the lower unit down and away. The drive shaft and shift linkage will come off with the lower unit. Use a good towel or other padding and clamp the lower unit skeg into a vise.
|

|
|
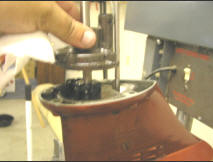
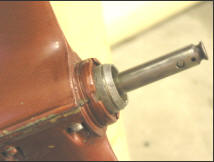
Remove the roll pin at the top of the driveshaft. You will need this out of the way so you can remove the impeller housing. Do not pull the driveshaft out of the lower unit because it may be difficult to get it back in. Sorry for the fuzzy picture below.

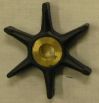
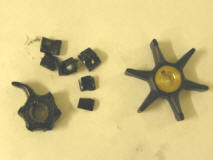
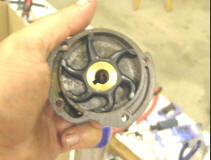
Remove the four screws that hold on the impeller housing. Lift the impeller housing off the driveshaft. The old impeller should be inside this housing. In my case, the impeller was in pieces (not good). Remove the impeller, clean and blow out the impeller housing. Below you can see the old impeller in pieces and the new impeller.
|
|
|
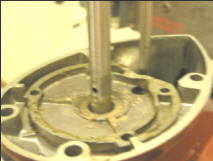
Remove the impeller key from the driveshaft. This part is easy to lose and hard to replace to be careful.

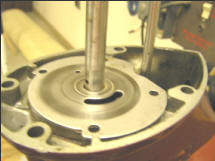
Remove and clean the impeller wear plate. Blow out with compressed air so there is no loose pieces of the impeller or other foreign particles that can get caught in the water passages of the power head. Replace the wear plate.
|
|
Place the new impeller into the impeller housing. This can be a bit of a trick. You need to rotate the impeller counter clockwise and bend the tabs, so they fit within the housing. Replace the impeller key and housing and secure with the four screws that hold the impeller housing down. It is important not to forget the impeller key. Without it, the impeller will not spin and pump water. At this point also replace the roll pin at the top of the drive shaft.
|

|
While you have the lower unit off, clean and blow out everything you can including the water tube that takes water from the impeller housing to the power head. Put a thin coat of silicone on the mating surface of the lower unit before putting it back onto the midsection. You may have to move the lower unit around to get the driveshaft and shift linkage to feed back up through the midsection. Bolt the lower unit on with the four bolts and 7/16 wrench.
|

|
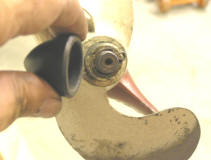
Replace the prop, shear pin, cotter pin, and prop cap.
|
|
Attach the shift linkage. Clean and blow out the area as much as you can. Replace the drive shaft spring, cap, and washer on the drive shaft.

|

|
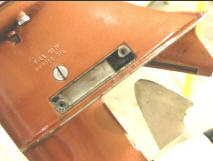
Remove the water inlet plate and inspect behind it. If anything is in there, clean and blow it out. Put the plate back on with inlets facing toward the rear.
While you the power head off, turn upside down, inspect the lower drive shaft seal and replace if necessary. Clean and blow out all water passages. Now you can set the power head back into place and screw in the seven power head screws. Note, the forward power head screws can be difficult to replace. The trick I used was to take some silicone and put it on the screw head. Put the screw head on the screw drive and let it dry. Now the screw will stay on the screw drive so that you may get the screw into the forward holes of the power head.

|
|
Now your lower unit is serviced, and your motor should run cool with your new impeller water pump.