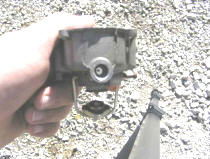
Anytime you have an old motor that sat around for a while, you can assume that the carburetor needs service. Gas, especially when mixed with oil will turn to varnish or otherwise gum up your carburetor and eat away at the gaskets. While there are many carburetor cleaning additives that you can put in your fuel tank or spray directly into the carburetor, they will not come close to accomplishing the same thing as a carburetor tune up. Even if the motor was stored without fuel in the carburetor, the gaskets may dry out and crack or quickly deteriorate once you try to use it again. The only way to make sure the carburetor is going to function well is to remove, disassemble, clean, and assemble with new carburetor kit parts, replace, and make adjustments. These are the steps to performing a carburetor tune up.
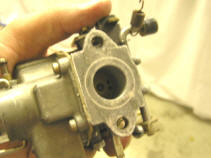
The carburetor is a simple, cheap, and time proven-device which properly mixes air and fuel before it enters the combustion chamber for ignition. The carburetor for this motor is the same carburetor that is used on many outboard motors and even Lawn-Boy lawnmowers. There are many small parts which you do not want to loose so it is best to have a clean and organized work area.
The carburetor is part of the overall Fuel System which starts at the gas tank and fuel line. The tank that came with these 50's era motors were dual line pressurized tanks. OMC eventually got away from using pressurized tanks in the 60's and went to single line suction tanks. Given the condition of my tank and fuel lines, I decided to convert to a more modern single line tank by adding a Mikuni vacuum fuel pump, which I bought on-line for about $22.00, and swapping out the fuel line connector to the single line type. CLICK HERE to see a description and pictures of my upgrade project.to the newer tanks. If you are intent on keeping everything original on your motor, then there are kits available to replace the lines, connectors, and seals for your pressure tanks.
There is a fuel filter for this motor attached to the bottom of the carburetor bowl. This filter is a glass bowl designed to trap water and sediment and should be removed for cleaning from time to time. You want to make sure that the fuel tank you are using is clean and free of varnish, rust, or old fuel. It is a good practice to discard unused fuel and start each season out with fresh fuel. The gasoline that you buy today does not store nearly as long as it did in years past. Also if possible, stay away from gasoline with alcohol or ethanol in it as these fuels tend to attract moisture and you wind up with water in your fuel. Cars typically burn up a tank of fuel every week or so but boats, if not used regularly can have fuel go bad. It is amazing how many people think they can run their motor on fuel that is several years old.
The fuel/oil mixture for this motor is 24:1. This works out to be 16 ounces of TCW-3 rated 2 cycle oil for a 3-gallon tank of 87 octanes unleaded gasoline or 32 ounces for a 5-gallon tank.. 2 cycle motor oil has evolved over the years. The current and best 2 cycle oil available today will have a TCW-3 rating. There is such a thing as TCW-2 and older versions but the advantage of using the newer oil is that you will get better lubrication and less carbon buildup than with the older oils. The original mixing instructions for these old motors talk about a 16:1 ratio of leaded gasoline to standard 30 weight motor oil but you must keep in mind that a lot has changed since that time. TCW-3 is the rating on pretty much any 2 cycle oil you can buy today. If you have some old TCW-2 oil sitting around, go ahead and use it, maybe with every other tank full until it is gone. Also, there is no advantage in using higher octane or leaded fuel so stick with the less expensive 87 octanes unleaded gasoline and your motor will be happy. Newer 2 cycle motors use a 50:1 oil mixture but this is not enough oil for your motor because of the type of bearings is has internally. Do not use anything less than a 24:1 mixture or you can damage your motor.
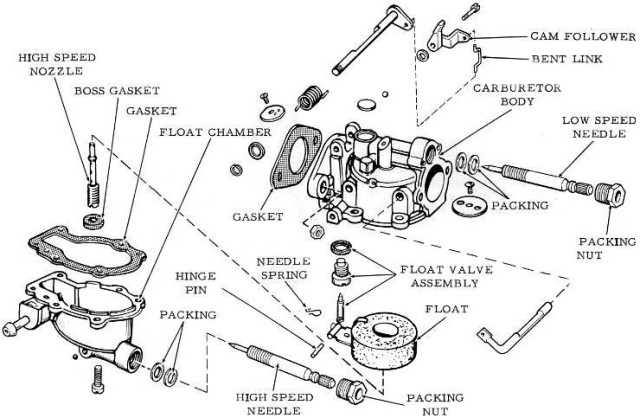
The carburetor mixes the correct proportions of air and fuel into an atomized mixture. The amount of fuel/air mixture that is allowed into the cylinders determines the speed and power. The fuel and air are mixed in the venturi, commonly called a barrel. This simple carburetor has only one barrel. The venturi is simply a carefully sized restriction in the carburetor through which air that is being sucked into the engine must pass. As the air passes through this restriction, it speeds up causing lower pressure to suck fuel through a jet that releases fuel inside the venturi where it turns into a vapor. The jet draws its fuel from the carburetor bowl which contains a small reservoir of fuel in the carburetor bowl. The amount of fuel in the carburetor bowl is controlled by the float and float valve assembly that keeps the bowl full of fuel. A high and low-speed needle valves adjust the ratio of fuel to air within small limits. The volume of air entering the carburetor barrel is controlled by a butterfly valve which is twisted open by the throttle lever.
This carburetor also has a choke. When you pull the choke button on the front of the motor, a second butterfly valve, located upstream of the venturi is closed causing a higher fuel to air mixture which is required to start a cold motor. When you first start your motor, you need to close the choke by pulling the choke knob. Once the motor "pops" or "sputters", you can close the choke as the carburetor is ready to function normally.

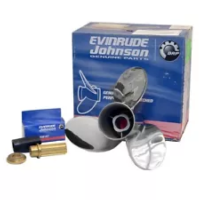
You will need to buy a
Carb Kit NAPA Part Number 18-7043 or replacement for OMC Part Number 382047, 3832049, 383062, 383067, or 398532
I paid $15.49, this kit did not include float. If needed, you can buy it separately for about $3.00
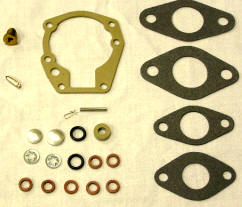
Carb Kit OMC Part Number 382045 or 382046 NAPA/Sierra Part Number 18-7043
Help support this site: Click HERE and buy it on Amazon.com
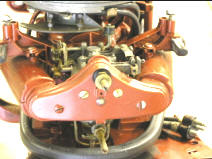
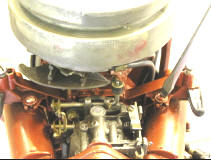
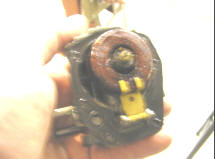
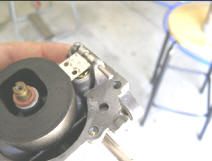
Remove the front Panel and Air Silencer
Remove the screws that hold the Choke Button, Slow and High-Speed Control Knobs, and slide the panel forward and off.

|
|

|
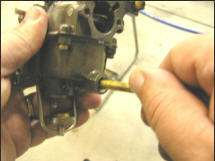
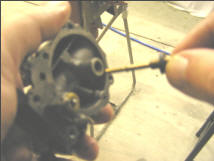
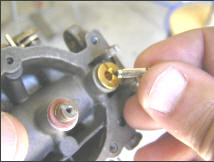
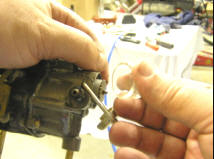
Remove the packing nut for the slow speed jet.
|

|

|
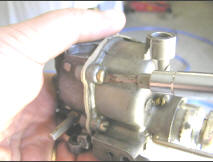
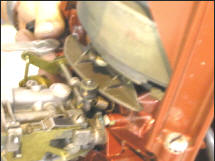
Remove 4 screws holding on the air silencer and then remove the air silencer by moving forward and lifting away.
|

|

|
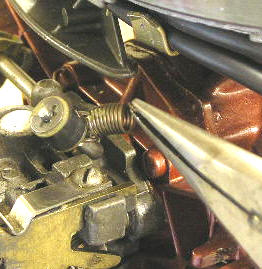
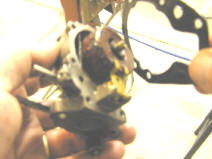
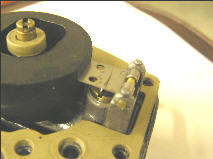
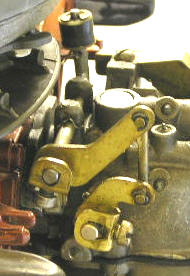
Disconnect the tension spring that holds the timing advance lever wheel against the timing advance base.
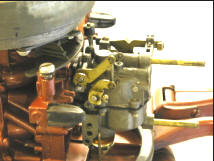
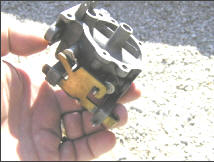
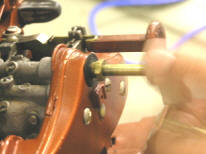
Remove the throttle linkage. Use the picture below as a reference for reassembly. Unscrew the screws just enough to allow the linkage to slip off.
|

|
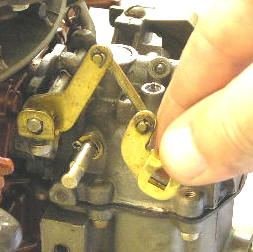 |
Remove the retainer clip for the timing advance lever. Be careful not to loose this clip. Slide the timing advance lever to the right and remove.
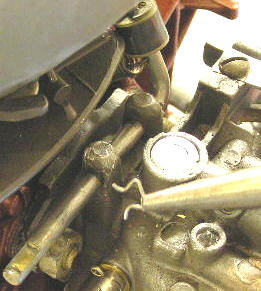
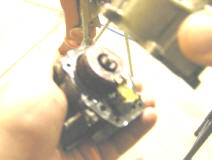
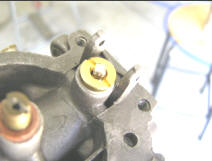
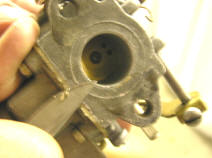
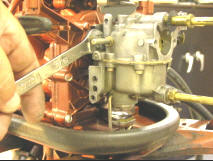
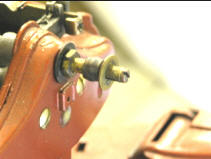
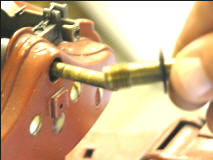
With a 7/16 wrench, remove the two nuts that hold the carburetor body to the intake manifold.

|
|
If you choose, you can upgrade to a fuel pump and suction tank while your carburetor is off the motor. CLICK HERE to see the procedure for this upgrade.
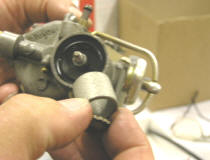
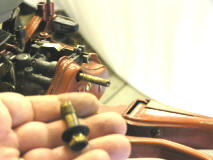
Disassemble the Carburetor Filter
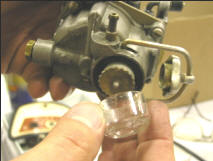
This carburetor has a glass fuel filter on the bottom of the carburetor. Remove the glass bowl. Unscrew the small "sprocket" nut and slide out the filter cylinder. Remove the round rubber gasket. It is important to clean all these parts. Do not spray carburetor cleaner on any rubber gaskets because the rubber may dissolve. This gasket is important to form an air tight seal with the glass bowl.
 |
 |
 |

Disassemble the Carburetor
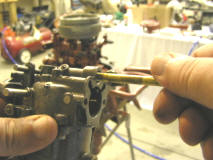
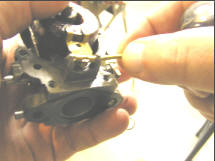
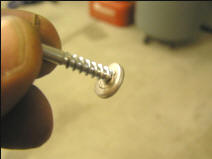
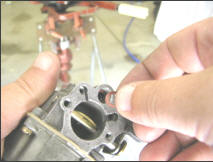
Unscrew and remove the high and slow speed jets from the front of the carburetor. Remove old packing washers. This may take some work to remove these old packing washers but you will be replacing these with new packing washers then you do your reassembly.
|
|
|
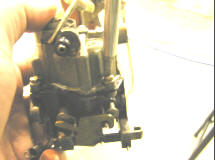
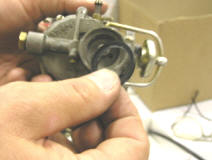
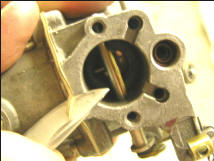
Remove the screws that hold the upper and lower halves of the carburetor body together. Pull the halves apart. The gasket between these two halves will be replaced with a new gasket from the carb kit.
|
|
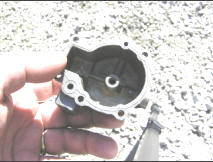
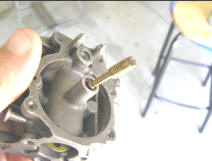
This carburetor has an original cork float. Notice that the float is deteriorated and junked up with varnish. This carburetor could never function well without being torn down, cleaned, and reassembled with new carb kit parts.
|
|
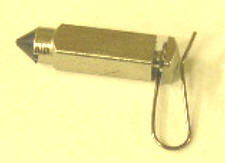
Remove the float hinge pin. This pin will be replaced with a new pin from the carb kit. Remove the float, float and valve assembly. You will be reassembling with a new float valve assembly from the carburetor tune up kit.
|

|
|
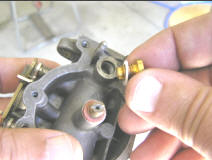
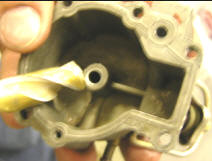
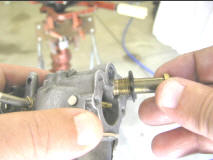
Remove the high-Speed nozzle. Remove the round aluminum plug from the top of the carburetor. This is most easily done by drilling a small hole in the center and then screwing in a sheet metal screw to pry out the aluminum plug. There is a new plug in the carburetor tune up kit. Clean out the area behind the plug. Once clean, replace the plug by lightly tapping into place with a screwdriver handle or small hammer. It is a good idea go place a film of silicone around the edges of the aluminum plug to prevent air leaks.
|

|
|
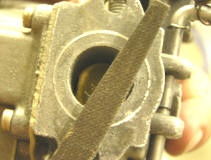
Thoroughly clean the carburetor parts.
Spray all metal parts down with carburetor cleaner. You may want to soak these parts overnight in a coffee can. Wipe down and blow off all parts with compressed air. Blow out all passages and make sure there is no blockage. Many of these passages are quite small and easily blocked by stray particles. Hold the carburetor body in bright sunlight and inspect closely.
 |
 |
![Johnson Seahorst 5.5 Carburetor Cleaning [Click and drag to move] ](/sites/outboard-boat-motor-repair.com/files/inline-images/Evinru45.jpg) |
 |
Reassemble the Carburetor
Basically, reassembling the carburetor is like going through the steps of disassembly but in reverse. You may even seem some of the same pictures used in both disassembly and assembly. There are a few things about carburetors that you need to appreciate in order to take the care necessary in order for your carburetor to function well after it is put back together. You will want to reassemble with new parts from your carburetor tune up kit. You want to make sure that there is no dust, sand, bits and pieces of gasket material or any other foreign material that could get stuck in one of the small passageways. One of the biggest concerns when assembling a carburetor is to make sure that there will be no air leaks. The slightest air leak around a gasket or fitting can cause the carburetor not to function poorly. Have you ever tried to suck soda through a straw with a tiny pin prick in it? The smallest air leak will throw off the correct regulation of the fuel/air mixture that the carburetor is responsible for creating. Take your time and do this right. When necessary, refer to the exploded drawing to make sure you are using all the proper washers and gaskets. This is not one of those projects where you want to wind up with leftover parts unless they are parts that you replaced with new parts from the carburetor tune up kit.
Assemble the Top Half of the Carburetor
Screw in the high-speed nozzle and slip on the boss gasket. Note: The red packing washer shown in the pictures below is not correct. The boss gasket is thicker, spongy, and tan in color.
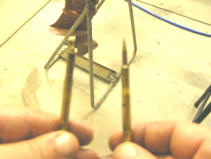
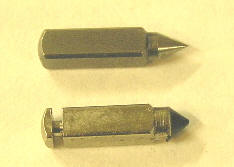
Screw in the float valve assembly. Insert the new float needle and attach the needle spring. Your old float needle may not have a spring the newer needles have a rubber tip and require the spring to keep from sticking. The picture of the new and old float valve needles. The old needle is on top. It has no rubber tip or place to clip on the needle spring. The float spring is highly important so be careful not to loose it the needle spring or forget to install it (as I did). Install the new float and float hinge pin. Clip the float needle spring to the float hinge.
|

|
|
|
|
|
 |
|
Prepare the Bottom Half of the Carburetor
Using a drill bit, gently remove any burrs from the hole where the base of the high-speed nozzle. Be sure to blow out any dust for bits of metal with an air hose. This will need to form an air tight seal with the boss gasket. Reassemble the glass fuel filter. Be sure that the rubber gasket is in place to form an air tight seal with the glass bowl.
|
|

|
|
|
Attach the Top and Bottom Half of the Carburetor
Make sure that the gasket is lined up with the holes. Tighten the screws so that they are snug but be careful not to over tighten. Tighten the screws in a star pattern so the two halves are pressed together evenly.
Install Packing Washers and Nuts for High and Slow Speed Needles
Insert two red packing washers into the high and slow-speed needle holes. As the packing nut is tightened, these washers will expand and form an air tight seal around the high and slow-speed needles. They will create needed friction for these needles so they will hold their adjustments. For now, only use your fingers to screw in the packing nuts. The longer packing nut goes on top. Go ahead and tighten the lower packing nut but the upper will have to be removed to put the face plate back on.
|
|
|
 |
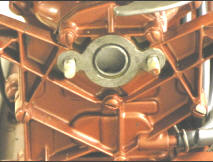
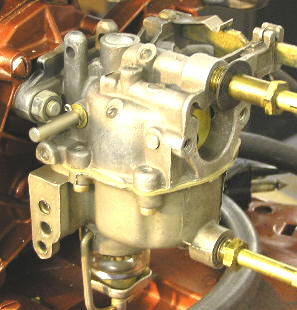
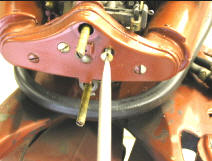
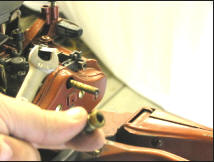
Prepare the Carburetor and Mount to the Intake Manifold
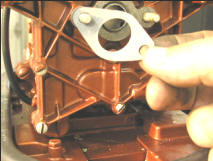
Again, it is highly important to prevent air leaks. You should trim the excess gasket to allow the carburetor to mate flush to the intake manifold. Use a file to file down any rises and burrs. When you can see bare metal all the way around, you know you have no more high spots. Be sure to blow out with an air hose to remove any particles. The carb kit comes with different size gaskets because the same kit may be used for larger carburetors. Make sure you have the correct size gaskets. The second gasket helps insulate the carburetor from engine heat.
 |
 |
 |
 |
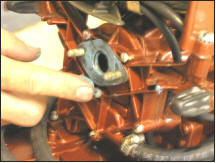
Place two gaskets on the intake manifold. Use your finger and lubricate these gaskets with some grease to insure an airtight seal. Make sure you have the correct size gaskets. The second gasket helps insulate the carburetor from engine heat. Use a 7/16 wrench to tighten the two nuts. These nuts need to be snug but be sure not to over tighten.
|
|
|
Install Timing Advance and Throttle Linkage
Slide the throttle advance back into place and replace the retainer clip.

Replace the throttle linkage. Notice the flat part of the linkage goes against the flat part of the throttle post and timing advance arm. Tighten the screws so that the linkage has no play but be careful not to over tighten.
 |
 |
 |
Adjust the Timing Advance Base
Using a 5/16 wrench, adjust the timing base so that the wheel just begins to touch the timing advance base at the "start" mark. When the throttle is turned to advanced, adjust the other end of the timing advance base so that the throttle linkage holds the butterfly valve wide open.
 |
 |
Replace the Air Silencer and Face Plate
Remove the slow speed needle and packing nut. Replace the air silence.
 |
 |
 |
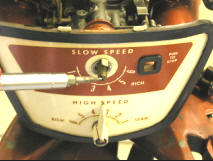
Remove the packing nut for the slow speed jet. Replace the air silencer with it's 4 mounting screws. Replace the slow speed packing nut and needle. Now you can tighten the packing nut to snug the packing washers against the needle. Be sure not to over tighten. The slow speed needle should be able to turn with your fingers but with enough friction to hold adjustment. Using your fingers, screw the slow and high-speed needles in until snug and then back out 1.5 turns as a starting point for adjustment. Replace the face plate, choke button and slow and high-speed knobs.
 |
 |
 |
 |
 |
 |
Your carburetor is now back together and ready for tank testing and adjustment.

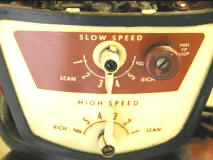
Adjusting the High and Slow Speed Needle Valves
Adjusting the carburetor in a tank is not the same as adjusting for open water. You can do initial settings in a tank and then fine tune the settings once you are out on a body of water.
Screw in the bottom (high speed) needle until seated and then back out 1 turn.
Screw in the top (slow speed) needle untill seated and then back out 1.5 turns.
(High Speed) Start engine (it will run pretty rough), shift into forward gear, take up to full throttle. In segments of 1/8 turn, waiting for the engine to respond between turns, start turning in the bottom high speed needle valve. You'll reach a point whereas the engine will either start to die out or spit back (sounds like a mild backfire). At that point, back out the needle valve 1/4 turn. Within that 1/4 turn, you'll find the smoothest setting.
(Low Speed) Slow the engine down to where it just stays running. Shift into neutral. Again in segments of 1/8 turns, start to turn the top needle valve in. Wait a few seconds for the engine to respond. As you turn the valve in, the rpms will increase. Lower the rpms again to where the engine will just stay running. Eventually you'll hit the point where the engine wants to die out or it will spit back. Again, at that point, back out the valve 1/4 turn. Within that 1/4 turn, you'll find the smoothest slow speed setting.
When you have finished the above adjustments, you will have no reason to move them again unless the carburetor fouls/gums up from sitting, in which case you would be required to remove, clean, and rebuild the carburetor anyway.