Fuel System - Anytime you have an old outboard boat motor that sat around for a while, you can assume that the carburetor needs service. Gas, especially when mixed with oil will turn to varnish or otherwise gum up your carburetor and eat your gaskets. While there are many carburetor cleaning additives that you can put in your fuel tank or spray directly into the carburetor, they will not come close to accomplishing the same thing as a carburetor tune up. Even if the motor was stored without fuel in the carburetor, the gaskets may dry out and crack or quickly deteriorate once you try to use it again. The only way to make sure the carburetor is going to function well is to remove, disassemble, clean, and assemble with new parts, replace, and make adjustments. These are the steps to performing a carburetor tune-up. While servicing the carburetor, you should consider the entire fuel system which includes the gas tank and fuel line.
The fuel/oil mixture for this motor is 24:1. This works out to be 16 ounces of TCW-3 rated two cycle oil for a 3-gallon tank of 87 octane unleaded gasoline or 32 ounces of oil if you are mixing up a 6-gallon tank. 2 cycle motor oil has evolved over the years. The current and best two cycle oil available today will have a TCW-3 rating. There is such a thing as TCW-2 and older versions, but the advantage of using the newer oil is that you will get better lubrication and less carbon buildup than with the older oils. The original mixing instructions for these old motors talk about a 16:1 ratio of leaded gasoline to standard 30 weight motor oil but you must keep in mind that a lot has changed since that time. TCW-3 is the rating on pretty much any two cycle oil you can buy today. If you have some old TCW-2 oil sitting around, go ahead and use it, maybe with every other tank full until it is gone. Also, there is no advantage in using higher octane or leaded fuel, so stick with the less expensive 87 octane unleaded gasoline and your motor will be happy. Newer two cycle motors use a 50:1 oil mixture but this is not enough oil for your motor because of the type of bearings is has internally. Do not use anything less than a 24:1 mixture or you can damage your motor.
The carburetor is part of the overall Fuel System which starts at the gas tank. The tank on this motor is mounted directly on top and fuel is fed by gravity, so there is no fuel pump. You do, however, want to make sure that your fuel tank is drained, clean inside and out, and does not leak. Click HERE for instructions on how to remove the fuel tank.
|
|
If you have compressed air, blow out the fuel line. With the gas cap and vent closed, blow air into the tank to see that it holds pressure and does not leek air. Open the vent and blow air into the tank and let it escape through the vent.
There is no fuel filter on this motor, so you will want to make sure your fuel tank is not rusted or contains varnish. Some of the newer 3 HP motors contain a screen filter inside the fuel tank. Fuel flows from the tank, through a shutoff valve, and directly into the carburetor. Any particles in the tank will soon find their way into the carburetor where they will cause a problem. Some of the tricks for cleaning out old fuel tanks include rinsing the tank out with paint thinner. If the tank is gummy with varnish, you may want to put some nuts and bolts in the tank and shake - shake - shake until things loosen up. Do not do this trick with gasoline in the tank because the shaking of loose metal objects may cause a spark and boom! Count the nuts and bolts you put in the tank so you can be sure they all come back out.
It is a good practice to discard unused fuel and start each season out with fresh fuel. The gasoline that you buy today does not store nearly as long as it did in the past. Also if possible, stay away from gasoline with alcohol or ethanol in it as these fuels tend to attract moisture and you wind up with water in your fuel. Cars typically burn up a tank of fuel every week or so but boats, if not used regularly can have fuel go bad. It is amazing how many people think they can run their motor on fuel that is several years old.
The fuel/oil mixture for this motor is 24:1. This works out to be 16 ounces of TCW-3 rated two cycle oil for a 6-gallon tank of 87 octane gasoline. 2 cycle motor oil has evolved over the years. The current and best two cycle oil available today will have a TCW-3 rating. There is such a thing as TCW-2 and older versions, but the advantage of using the newer oil is that you will get better lubrication and less carbon buildup than with the older oils. The original mixing instructions for these old motors talk about a 16:1 ratio of gasoline to standard 30 weight oil but you must keep in mind that a lot has changed since that time. TCW-3 is the rating on pretty much any two cycle oil you can buy today. If you have some old TCW-2 oil sitting around, go ahead and use it, maybe with every other tank full until it is gone. Also, there is no advantage in using higher octane or leaded fuel, so stick with the less expensive 87 octane unleaded gasoline and your motor will be happy. Newer two cycle motors use a 50:1 oil mixture but this is not enough oil for your motor because of the type of bearings is has internally. Do not use anything less than a 24:1 mixture or you can damage your motor.
Carburetor Tune-up
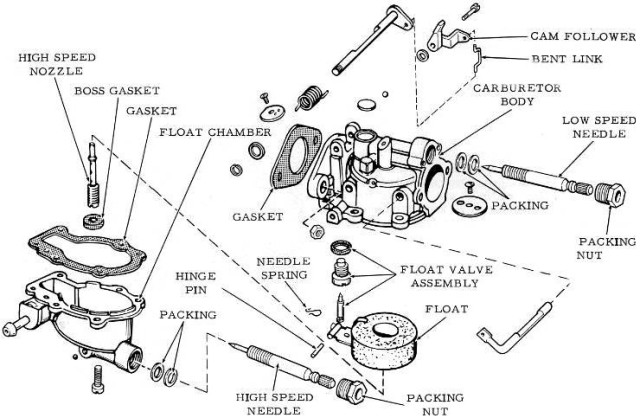
The carburetor is a simple, cheap, and time-proven device which properly mixes air and fuel before it enters the combustion chamber for ignition. The carburetor for this motor is the same carburetor that is used on many outboard motors and even Lawn-Boy lawnmowers. There are many small parts which you do not want to loose so it is best to have a clean and organized work area.
The carburetor mixes the correct proportions of air and fuel into an atomized mixture. The amount of fuel/air mixture that is allowed into the cylinders determines the speed and power. The fuel and air is mixed in the venturi, commonly called a barrel. This simple carburetor has only one barrel. The venturi is simply a carefully sized restriction in the carburetor through which air that is being sucked into the engine must pass. As the air passes through this restriction, it speeds up causing lower pressure to suck fuel through a jet that releases fuel inside the venturi where it turns into a vapor. The jet draws its fuel from the carburetor bowl which contains a small reservoir of fuel. The amount of fuel in the carburetor bowl is controlled by the float and float valve assembly that keeps the bowl full of fuel. A high and low-speed needle valves adjust the ratio of fuel to air within small limits. The volume of air entering the carburetor barrel is controlled by a butterfly valve which is twisted open by the throttle lever.
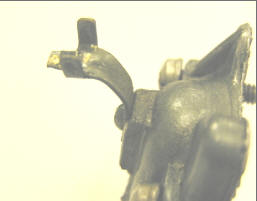
This carburetor also has a choke. When you pull the choke button on the front of the motor, a second butterfly valve, located upstream of the venturi is closed causing a higher fuel to air mixture which is required to start a cold motor. After the motor starts to warm up, the choke can be opened partially then fully by pushing the choke button in.
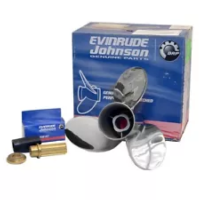
You will need to buy a Carburetor Tune Up Kit or "Carb Kit" for your specific outboard boat motor.
Carb Kit OMC Part Number 382045 or 382046 NAPA/Sierra Part Number 18-7043
Help support this site: Click HERE and buy it on Amazon.com
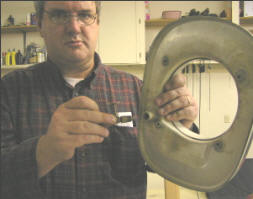
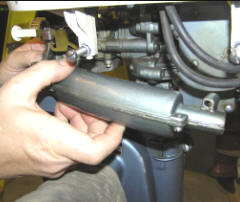
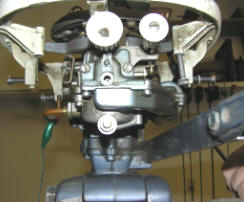
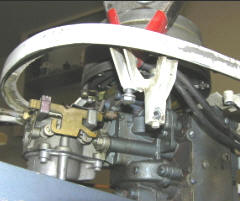
Remove the Air Silencer
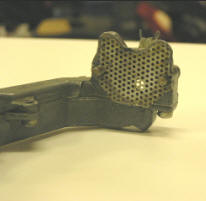
At first glance, the silencer looks like a muffler but it is not. Silencers were added in order to quiet the motor down. Remove the silencer by unscrewing the two screws holding it to the front of the carburetor. Remove the third screw from the side of the motor. This screw may be hidden by the spark plug wires which can be moved out of the way. Carefully move the silencer, making sure you do not loose flame arrester screen which fits between the silencer and carburetor intake. Also, if the gas tank is removed, one of the gas tank bolts may fall loose.
|

|
|
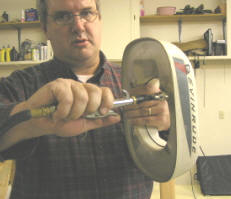
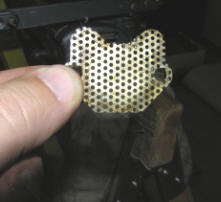
The necessity of this flame arrestor screen is the subject so some debate. Some say it is not necessary and only restricts air flowing to the carburetor. Others say it is necessary to provide back pressure on the carburetor intake. I think the engineers at Evinrude intended for it to be there so I will keep it on my motor. Maybe some day I will run the motor without it and see what happens.
|
|
Blow the silencer out with compressed air to make sure that no bug made his home in there.
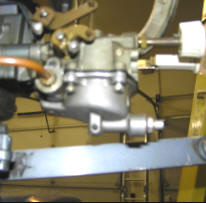
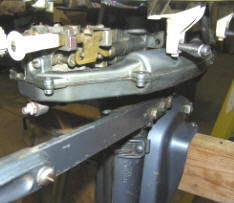
Remove the Float Bowl
Another subject of debate is whether or not you need to completely remove the carburetor from the motor and tear it completely apart. My opinion is that if the gasket between the carburetor and motor is not leaking air or otherwise bad, leave it alone and avoid a lot of work. If your carburetor does not perform when you are done with this procedure, you can go back and tear it completely apart. 99% of the time, this will not be necessary. I prefer to keep this procedure as simple as possible.
|
|
|
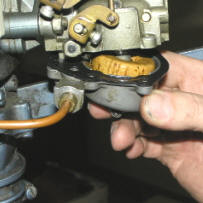
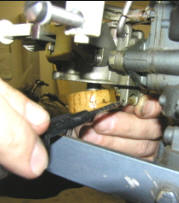
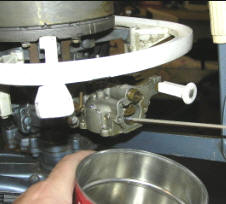
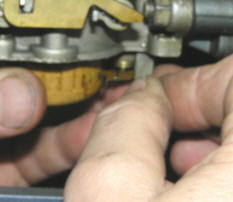
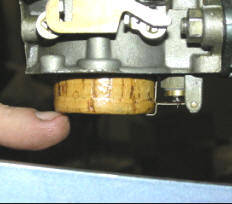
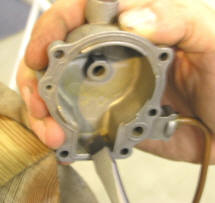
Unscrew the 5 screws holding the float bowl. You may wish to tilt the motor up to make the underside of the carburetor more accessible. Once the last screw is out, gently remove the float bowl.
|
|
|
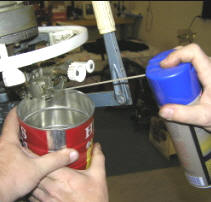
At this point, you want to get a can of carburetor cleaner which is available at any auto parts store. You also will need a coffee can to clean parts and catch the carburetor cleaner as you spray out your carburetor.
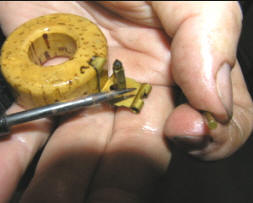
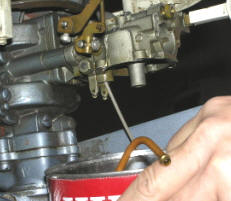
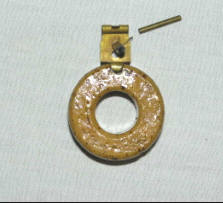
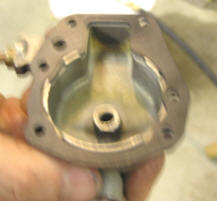
Using a pointed object, push the float hinge pin. This simply pushes out of the hinge. Remove the float and float valve. The float valve is one of the items which will be replaced. Unscrew and remove the float valve assembly (the part that the float valve fits into). The carb kit will contain a new float valve assembly.
|
|
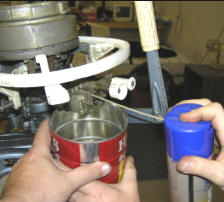
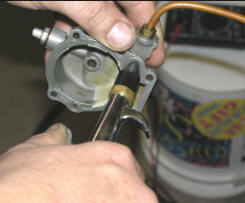
While holding the coffee can under the carburetor, spray out the inside of the carburetor with carburetor cleaner. The straw that is provided with the can of carburetor cleaner will allow you to apply cleaner directly to the air and fuel intakes, as well as float valve and high-speed needle areas.
|
|
|
|
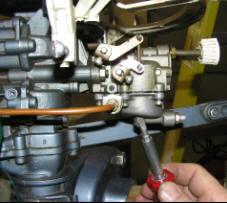
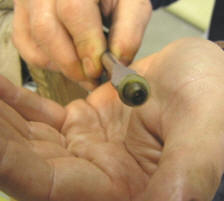
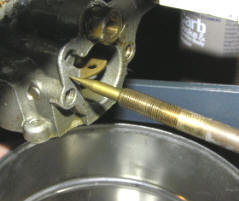
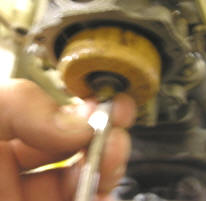
Remove the low speed adjustment needle by simply unscrewing in and pulling it out of the carburetor. Inspect the needle and place it into the coffee can for cleaning.
|
 |
Reassemble the Carburetor
There are a few things about carburetors that you need to appreciate in order to take the care necessary in order for your carburetor to function well after it is put back together. You will want to reassemble with new parts from your carburetor tune up kit. You want to make sure that there is no dust, sand, bits and pieces of gasket material or any other foreign material that could get stuck in one of the small passageways. One of the biggest concerns when assembling a carburetor is to make sure that there will be no air leaks. The slightest air leak around a gasket or fitting can cause the carburetor not to function poorly. Have you ever tried to suck soda through a straw with a tiny pin prick in it? The smallest air leak will throw off the correct regulation of the fuel/air mixture that the carburetor is responsible for creating. Take your time and do this right. When necessary, refer to the exploded drawing to make sure you are using all the proper washers and gaskets. This is not one of those projects where you want to wind up with leftover parts unless they are parts that you replaced with new parts from the carburetor tune up kit.
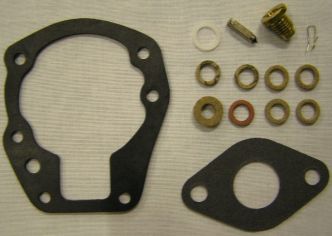
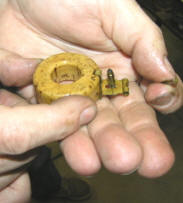
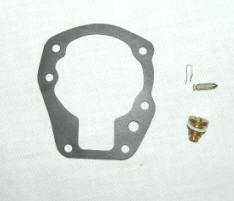
Since we did not completely disassemble the carburetor, we will not be needing everything that came in the Carb Kit. Pictured below are the actual parts from the carburetor kit that will be needed.
|

|
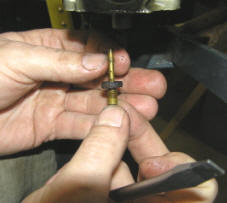
Replace the float needle valve assembly with the new one, provided in the carb kit by screwing in until snug. Do not over tighten Reassemble the float and float valve using the new float valve and needle spring provide in the carburetor tune-up kit.
|
|
|
Install the float and float needle and insert the float hinge pin to hold the float into place. With the float installed, it should be adjusted so it will engage the float valve when it is level.

|
|
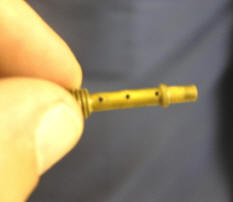
Replace the high-speed nozzle. Do not over tighten. Using compressed air, blow out the float bowl and fuel intake and line.
|
|
|
Place the new float bowl gasket, provide in the carb kit and line up all holes. Carefully mount the float bowl to the carburetor body using the five screws. Start all the screws and leave loose. Adjust the gasket to make sure it is placed properly and then tighten the five screws in a star pattern so that you will press against the gasket evenly. Do not overtighten.

|
|
Screw the low speed needle back in.
Using a clamp, place one of the longer gas tank bolts up into its bracket on the front port side of the motor. This is simply because the air silencer will prevent you from installing this bolt if you do not put it in place now. Use the clamp just to hold the bolt in place until the silencer is installed.

|
|
|
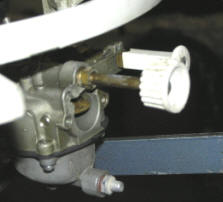
Reassemble the air silencer with the flame arrestor screen and mount to the front of the carburetor with the two screws. Be aware of the metal bracket that fits around the low-speed needle. This bracket prevents you from screwing in your low-speed needle too far and causing damage. You may need to bend this bracket so that it will fit up against the low-speed needle shaft correctly.

|
|
Adjusting the Slow Speed Needle
There is no high speed adjustment on this motor so only the slow speed needle needs adjusting.
This came from the Johnson/Evinrude forum at http://iboats.com. I do not know Joe Reeves, but his instructions are explained well. All credit goes to Joe Reeves for the following:
(Carburetor Adjustment - Single S/S Adjustable Needle Valve)
(J. Reeves)
Initial setting is: Slow speed = seat gently, then open 1-1/2 turns.
Start engine and set the rpms to where it just stays running. In segments of 1/8 turns, start to turn the S/S needle valve in. Wait a few seconds for the engine to respond. As you turn the valve in, the rpms will increase. Lower the rpms again to where the engine will just stay running.
Eventually you'll hit the point where the engine wants to die out or it will spit back (sounds like a mild backfire). At that point, back out the valve 1/4 turn. Within that 1/4 turn, you'll find the smoothest slow speed setting.
When you have finished the above adjustment, you will have no reason to move them again unless the carburetor fouls/gums up from sitting, in which case you would be required to remove, clean, and rebuild the carburetor anyway.
--------------------
Joe (30+ Years With OMC)